
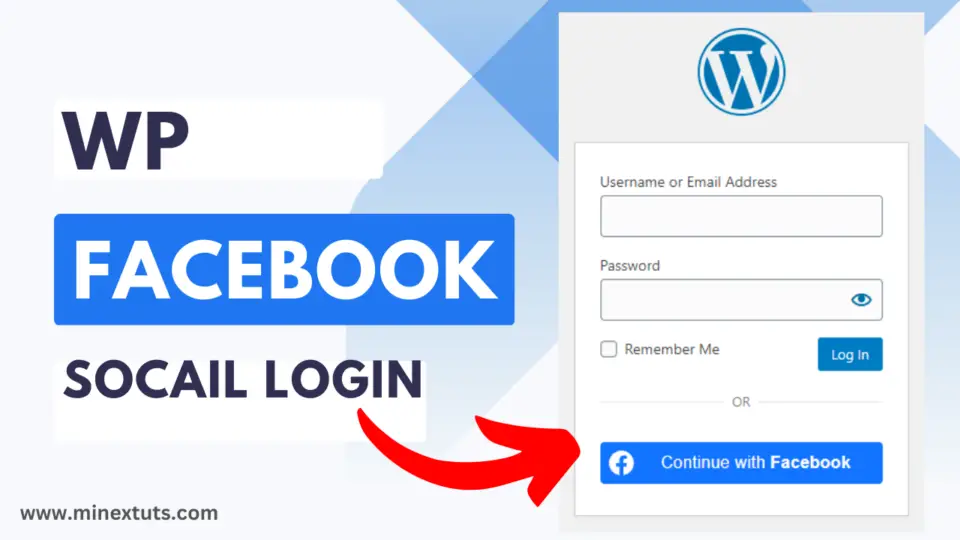
Hi there, and welcome to this tutorial on setting up Facebook social login on your WordPress website. This feature provides a convenient and secure way for users to log in with a single click rather than filling out multiple forms, which can increase user engagement and retention.
In this video, I’ll show you all the steps on how to install and configure the plugin, create a Facebook app, and add the social login buttons to your website. Let’s get started!
Installing Nextend Social Login Plugin

First, log in to your WordPress dashboard and navigate to the Plugins page. Search for “Nextend Social Login” and click the “Install Now” button. Once the plugin is installed, activate it by clicking the “Activate” button.
Now, you’ll see a new menu item in your dashboard under the settings tab called “Nextend Social Login”. Click on it to access the plugin’s settings page.
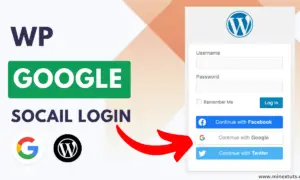
When you enter it, you will see you can set up Facebook, Google, and Twitter social logins for free; for other platforms, you have to go for the paid plan.

Click the “Get Started” button next to the Facebook widget. You will find some writing instructions here. Keep this window open when we create the Facebook app.
Creating a Facebook App
Before we can configure the plugin, we need to create a Facebook app. To do this, go to the Meta for Developers website.

If you do this for the first time, you need to click on the green “Register Now” button, fill out the form, and finally verify your account.
After you register as a Meta developer, you can go to the “My Apps” section. Then click on the “Create App” button at the right upper corner, and in the popup, choose the “Consumer” app type!

Fill in your “App Display Name” and “App Contact Email“. Your consent screen will display the specified “App Display Name” when your users try to log in to your website.
At the button, you can choose your meta business account; this is optional. After that, click the “Create app” button, and it will pop up a window to log in to your Facebook account for the security checkup.

In this window, find “Facebook Login” and click “Set Up“. Select “Web“, enter your website URL in the “Site URL” field, and press “Save”.
You don’t have to go forward with this process. Click on the “Settings” option that you find on the left side, under “Facebook Login”.
You have to copy the Auth redirect URL on the plugin page that we got before. Add this copied URL to the “Valid OAuth Redirect URIs” field and save it.

Okay, now click “Basic” from the “Settings” menu point in the top left corner. Here, you have to fill out basic information about your app. First, enter your website domain name into the “App Domains” field.
Enter your website’s privacy policy URL that explains what data you are collecting and how you will use that data.
At “User Data Deletion“, choose the “Data Deletion Instructions URL” option, and enter the URL of your page with the instructions on how users can delete their accounts on your site. On my site, it is included on the privacy policy page. So I entered that same URL here also.

Select “App Category,” “App Icon” and pick the “App Purpose” option that best describes your app, then press the “Save Changes” button.
Ok, now you have finished most of the app’s basic information. Your application is currently private, which means that only you can log in with it. In the top bar, switch the “App Mode” from “Development” to “Live“.

By default, your application only has standard access to the permissions, which is not enough for Facebook login. On the left side, click on “App Review”, then click “Permissions and Features”.
In this table, you will find the “public_profile” and “email” permissions, and you should click on the “Get Advanced Access” buttons next to them. It will enable these permissions for your application.

First, I am going to enable email permissions. Sometimes you may receive notifications to accept Meta policies or require verifications; you have to complete them to get permission.
Ok, now the next one is public profile permissions. You are almost finished now; the next thing is to get the app credentials and enter them on your WordPress website.
To get the app credentials, go to the “Settings” page and click on the “Basic” tab. Here, you’ll find your “App ID” and “App Secret”, which we’ll need to configure the Nextend Social Login plugin.
Configuring the Nextend Social Login Plugin
Go back to the Nextend Social Login plugin settings page and click on the “Facebook” tab. Enter your “App ID” and “App Secret” in the fields provided and click “Save Changes”.

Once you save the settings, it asks you to verify the configuration before it is published. Click the “Verify settings” button and log in using your Facebook account.
This app is working without any issues, so you just need to enable it. Ok, now you successfully configured this plugin.

You can also customize other settings here, such as the button design and which user data to request from Facebook.
Adding the Social Login Buttons to Your Website
Now that the plugin is configured, we can add the social login buttons to our website. Typically, this plugin adds social login buttons automatically to the WordPress login page. The “Global Settings” of the plugin allow you to customize it if you’d like.

You can add Facebook social button as a widget, go to the “Widgets” page in your WordPress dashboard and find the “Nextend Social Login” widget. Drag and drop it to your desired location, such as the login page or widget area.
Once the widget is added, users can click on the Facebook button to log in to your website using their Facebook credentials.

You can also use a shortcode to add these social buttons individually on your login page. Go to the “Nextend Social Plugin” and click the “settings” button on the widget.
Then navigate to the “Usage” tab, where you can find shortcodes, links, and image buttons. You will be able to customize social login buttons on the WordPress login page.
Congratulations! You’ve successfully set up Facebook social login on your WordPress website using the Nextend Social Login plugin.
If you have any questions or comments, feel free to leave them in our tech forum question section. Thanks for watching!
Leave a comment