
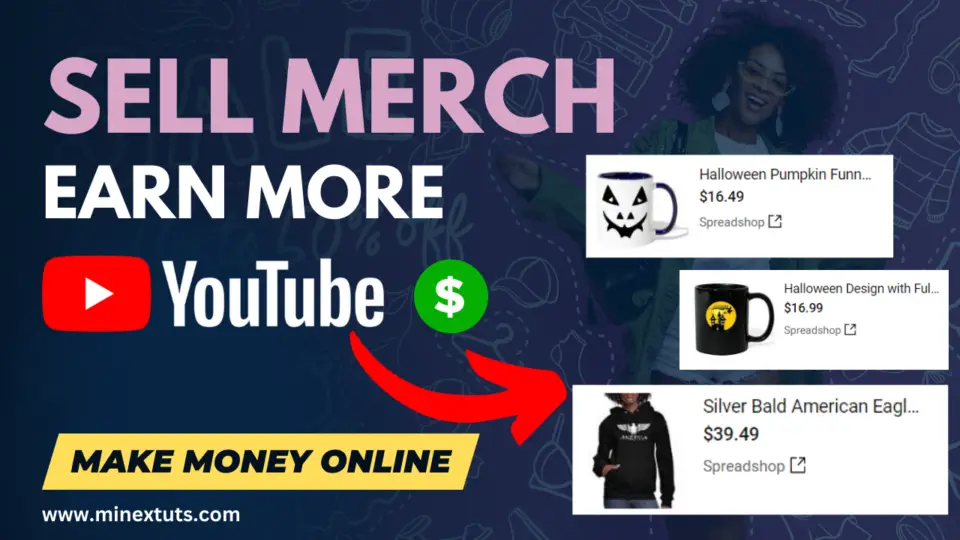
You may have already seen some YouTube channels selling merchandise on their channels. Additionally, they keep a storefront on the channel page.
In this video, we are going to show you how you can create this merch store and connect it to your YouTube channel. This will give you an extra source of revenue from your channel.
 1")
Currently, YouTube offers 4 platforms for us to start making money by selling merchandise. There are
- Shopify
- Spreadshop
- Spring
- Suzuri
 2")
Shopify is the best and most customizable platform among those available. But the problem here is that you have to pay monthly subscription fees and customize everything manually.
Connect Your Store to YouTube
For this video, we chose Spreadshop, which you can set up with a few clicks, with no monthly fees, and customize adequately.
 3")
The best thing is that you don’t have to worry about product printing, handling, or shipping. You just need to upload your design and choose the products you want to add to your shop, and they take care of everything else.
To start selling your products on YouTube, you should meet some requirements. First, you should have a YouTube channel, and it should be on the YouTube partner program. The third one is a merch store, which we are going to create in this video/ article.
 4")
YouTube Shopping Requirements
- YouTube Channel with 1000 Subscribers
- Join YouTube Partner Program (YPP)
- Supported Online Store
Step 1: Start Spreadshop for Free
 5")
Ok, let’s create a Spreadshop store before connecting to YouTube. You can check our article in the video description for more information and all the necessary links for this tutorial.
You can go to the Spreadshop page and open a new shop. You must enter your shop name, email address, and password.
Step 2: Add the First Product to Your New Shop
After creating your shop, you can add your first design before customizing the shop. Navigate to the “Design” tab; here you can add your design and select products that you want to sell on YouTube.
First, upload your product, and then you can edit it. Spreadshop selects some of the chosen products automatically for your design.
 6")
If you want more products, you can add them using this “All products” button. I like to go with these products, so I proceed to the next step.
On this page, add your design name, a description of your design, and any relevant tags. These details are extremely beneficial for SEO and user conversions, which lead to more sales.
Based on your title and the description, some tags are suggested by the platform; you can use those as well.
After completing all the details, click the “Create” button to finish the products. You will see this message because your shop is not activated yet. You can activate it immediately here or later, after customization. I am not going to launch the shop here.
Step 3: Customize the Spreadshop
Most of the shop interfaces and settings are automatically set, but we have to customize them before we launch the shop. Click the “Shop Settings” icon in the left menu.
Here, you can change your store’s default settings for things like SEO-related information, its appearance, prices, special offers, marketing, and a few more advanced features.
 7")
Let’s go over a few settings that need to be tweaked. You can experiment with different settings at your leisure.
1. General
Info & SEO
First, look at the general settings. Click “general” and navigate to the “Info & SEO” section. You have the option of changing the shop’s name, description, and URL. These details are shown on the search engine result page as well.
Legal Information
After that, you can enter details as an individual or a business and complete your legal information. I am going to fill it as a company.
Activate/ Deactivate
The third option in the “General” section gives you the option to publish your shop. The website is still not operational; once all the settings are complete, I will bring it online. Let’s have other settings in the list.
2. Page Settings
 8")
The next main section is “Page settings”. In this section, you can customize the default pages created by Spreadshop. You only need to customize the pages they already provide to create an online store.
There are options to customize the start page, product list page, and detail page. You can change these settings to suit your needs.
It is critical to fill out the details on the “about us” page because most buyers check this page before purchasing an item from your shop. I just added a cover image for the page and filled in some details here.
3. Appearance
Let’s navigate to the appearance tab, where you can customize the shop’s theme, color, and font as well as add a logo. I’m going to start by adding a logo, a favicon, and an invoice logo.
Color and Fonts
In the “Color and Fonts” section, you can change the colors of the main areas of the site, such as the header, background, footer, and navigation menus. Also, you can change the font of the shop.
Theme
Next, look in the “Theme” section; there are a few preset themes available. You can choose based on your interests.
Model Images
 9")
You can enable models for your designs under the “Model Images” tab. Once you turn it on, the model images are automatically used in your designs.
Another option to enable is a search filter for your products.
4. Price and Promos
 10")
The fourth option is “Price and Promos,” where you can set product profit margins and set promotions. You can set retail prices for each product category and decide your net profit.
The Promo Campaigns menu allows you to assign different promotion codes to your buyers. This will help you to attract more customers and regain abundant customers.
5. Marketing
 11")
The following section in the main navigation is “Marketing,” which covers social media marketing platforms such as Facebook, Instagram, Pinterest, and also Google Shopping.
6. Advanced
The final major section is “Advanced,” which allows you to add custom HTML and CSS codes as well as change the language and currency settings.
You can also add social media profiles to this shop by entering the URLs of the profiles. I am going to keep my default language and currency.
Step 4: Publish the Merch Store
We have configured all the basic settings for this shop. We can make it available online to the public. Go to the “general” section and switch it to “online” mode.
Shop Settings > General > Activate/Deactivate > Online
If you haven’t filled out your business information correctly, it will pop up when you try to publish the shop.
 12")
Congratulations! The store is now accessible online. Let’s see how you can connect this store to YouTube.
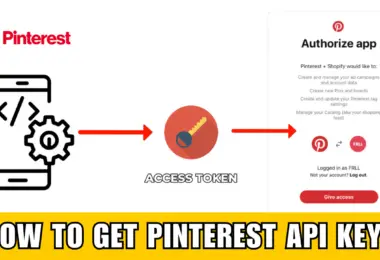
Step 5: Connect your Merch Store to YouTube
You must be a creator who is enrolled in the YouTube Partner Program to link your store to YouTube. Go to the “Monetization” section after logging into your YouTube studio. Click the “Connect Store” button under the “Shopping” tab.
YouTube Studio > Monetization > Shopping > Connect Store
 13")
Ok, then select “Spreadshop” as your option and agree to the terms after that. To complete the setup, click the “Go to SpradShop” link that you will see. A new page will open; here, click the “Let’s get started” button.
Spreadshop > Go to Spreadshop > Let’s get started
This is asking your country, and they will suggest some shop settings according to your location. Select the country and settings based on your YouTube channel audience because they are the main target audience of this store.
We have already set up the Spreadshop, so we just need to log in to that account here. You will see this red button after choosing the appropriate store. You have to authenticate your YouTube channel here to connect.
 14")
Okay, you’re finished; you can now begin selling merchandise on YouTube. This will take some time to push your products to YouTube. Check the shopping tab on YouTube after a few hours.
Step 6: Optimize your YouTube Shopping Store
A few hours later, some of your products will automatically appear like this. You can change the order of the products or set it to “Auto,” in which case YouTube will choose which kind of product to display.
You can find your products under the video if you check your video right now. Your audience can buy these products and also customize their own as well.
 15")
This is a great way to promote your channel as well as earn extra income from it. This may be more than your ad revenue.
If you have any issue regarding this tutorial, please open a thread on MinexTuts Tech Forum. We try our best to help you. Thank you for reading.


![How to Install Kali Linux on Windows 11 [GUI] without Virtual Machine or Dual Boot!](https://www.minextuts.com/wp-content/uploads/2023/04/google-play-store-2-380x260.png)
Leave a comment