
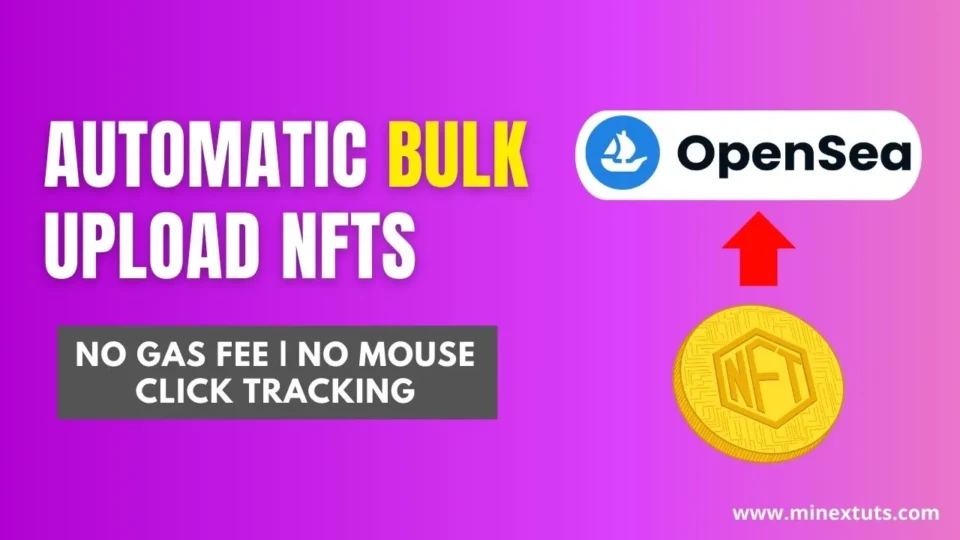
During this NFT tutorial series, you already learn how to generate a full NFT collection completely free. Now you should upload these NFTs to OpenSea for sale. Sadly, OpenSea does not have a method for listing a large NFT collection.
You have to upload them one by one. In this tutorial, we are going to show you an automated method to bulk upload NFT to OpenSea. Keep watching the tutorial, don’t miss any step in the process.
Please check the new updates at the bottom of the page.
Setup Automated NFT Minting App
You can use your home PC or virtual machine with remote desktop access known as VPS. For this tutorial, I use a virtual server to set up this automation. If you want to buy a cheap VPS (Virtual Private Server), check the below link.
Install Python on your PC
First, you have to install Python on your computer. Download the Python installer on the official website. After downloading the program, install it on your computer. Make sure you tick the box “Add python Path” on the Python installation wizard.
 1")
Download NFT Uploader
Next, you have to download the ZIP file that contains the NFT uploading program. After the download, extract the ZIP file. You can find the original GitHub project here. You have to copy and paste your generated NFT images and/or json files into the “scr” folder.
Most importantly, your NFTs should be numbered. Don’t include any names for them. This method will not work if you use any other name. If you use the NFT generator we used in previous videos or articles, you don’t have to worry. It automatically numbers the NFT collection.
Run the Python Bulk NFT Uploader
Ok, it is finished. Open the windows command prompt to run the Python program. You can find all of these commands and guidelines in the article. You don’t have any coding knowledge for that. You just need to copy and paste these commands from the article.
You have to navigate the path. Type “cd” and place the path of the NFT uploader folder. Remember to replace the path (Red colored) with your own path.
cd C:\Users\Administrator\Desktop\NFT\bulk-upload-to-opensea-mainNext type this command to install and set up other requirements.
pip install -r requirements.txtAfter that run this command to open the NFT uploader application. This is the program we are going to use for this uploading process. You can find more version in original GitHub page.
python upload_2captcha_V2.py 2")
Install Relevant Chrome Driver App
Before filling this application and starting NFT minting. You have to download and install the correct Chrome Driver version that fits the Chrome browser version. Let’s see the browser version. Click the “Open Chrome Browser” button of the app.
Before filling this application and starting NFT minting. You have to download and install the correct Chrome Driver version that fits the Chrome browser version. Let’s see the browser version. Click the “Open Chrome Browser” button of the app.
Go to the browser settings and navigate to the “about chrome” section. Here you can find the browser version. Now download the relevant version of the Chrome Driver app. This download is a ZIP file.
 3")
You have to extract the ZIP file or copy and replace the Chrome Driver exe that is already in the folder. Then run it as the administrator and see whether you get this message.
Add Metamask Crypto Wallet Extension
The next step is to download the Metamask Chrome extension and log in to OpenSea. You can download the Metamask Chrome extension from the Chrome web store or Metamask official site.
Add the extension to your Chrome browser. If you already have Metamask on your browser, you still need to add it again. Because this application opens a new Chrome user account.
You can import your Metamask wallet using your security phrase. Ok, now we are done with setting up the Metamask wallet. Keep in mind that this method only works for Metamask wallets.
Create New Collection on OpenSea
Let’s go to OpenSea and sign up using your Metamask wallet. You have to create a new collection for the listing. After signing up for your OpenSea account, click on your profile avatar and select the “Collection”. There is a button to create a new collection. I already created the collection for my new NFTs.
 4")
Now select the created collection and open it. You will see a button called “Add item” at the right upper corner of the collection page. Click it and copy the URL of the page. Then paste it on the OpenSea collection link textbox of the NFT uploader app.
Enter Metadata for NFTs
Here enter your starting number of the NFT collection and the end number. You can add any default price you want but it is marked by Ether or (ETH).
Change the NFT title but remember the title should end with a “#” symbol.
Enter any description for your NFTs and the NFT file format, in our case it is PNG. If you want to add an external link for your NFT collection, enter it here. You can get the idea from below example.
- Opensea collection link: https://opensea.io/collection/kick-skull/assets/create
- Start number: 0
- End number: 799
- Default price: 0.005
- Title: Kick Skull #
- Description: Kick Skull NFT collection from MineX Tuts.
- NFT image format: png
- External link: https://www.minextuts.com/category/blockchain/nfts/
 5")
Next, you can specify the duration of the NFT sale, and whether you use Polygon blockchain. After that, you should select the source folder where your NFT collection is stored.
You can also save your entries before starting the minting. Now open the Chrome browser using the button of the NFT auto uploader app.
ReCaptcha Auto Solver Extension
There is a Google ReCaptcha verification challenge that comes when you upload NFTs to OpenSea. You can’t do this manually each and every time. So we are going to automate the ReCaptcha solving.
First, you have to install a Chrome extension called “Buster Captcha Solver”. You can find the extension link here.
After you added the Buster captcha solver, click on the icon of Buster captcha solver and navigate to the “Options”. Select the “speech service” as the “Wit AI”, not the managed one.
Create Wit AI App API Key
Next, you have to get an API key for that. Wit AI is a free service based on artificial intelligence that provides voice and text recognition.
Ok, let’s go to the Wit AI official page and sign up for a new account. You have to use your Facebook account to sign up for this website. Click the “Continue with Facebook” button on the home page. A verification window will appear, giving access to continue the service.
The registration part is over. Now we are on the dashboard of Wit AI. The next step is to create a new app and get the API key.
Click the “New app” button in the dashboard. Give any name for your new app and set visibility to “Private”. Click the “Create” button to start the app.
 6")
This is your newly created app, you can navigate to the “Settings” tab to get the API key. There are two API one is the server access token and the other is the client access token. You have to copy the client access token.
Then go to the Buster captcha solver extension and change the API language to English. Next click “add API” and paste the client access token here.
Start Bulk Upload NFT to OpenSea
Ok, now we are done with all of the pre-required settings and preparations. All you have to do is press the “Start” button and wait and see the process.
It automatically goes to the OpenSea listing page, fills in all the details, and lists the item on OpenSea. After that, sell the listed item and verify the transaction with Metamask. You don’t have to do anything.
New Updates: 6/14/2022
Version 2.0.1 (upload_2captcha_V2.py)
Deleted some controls that were no longer needed for the polygon.
Added Latest stable release: ChromeDriver.
Version 2.0.0 (upload_2captcha_V2.py)
2Captcha and Buster Solver combined in one file.
Added repetitive error checks for many possible errors that may occur on the site.
Added “chrome_extension” Please open chrome_extension folder and read the instructions.
Navigate to chrome://extensions
Expand the Developer dropdown menu and click “Load Unpacked Extension”
Navigate to the local folder containing the extension’s code and click Ok
Assuming there are no errors, the extension should load into your browser

OR

If it is ZIP’d, extract the contents somewhere
In Chrome, open chrome://extensions/
Click + Developer mode
Click Load unpacked extension…
Navigate to the extension’s folder and click OK
Delete the (extracted) folder (the extension was copied)
Collection Scraper added as prototype.
FAQ – Bulk NFT Uploader
What are the best practice of this NFT uploader?
It is better to list your very first item of the collection manually.
How to fix after got an error?
If you experience any interruption during the process, you can simply change the starting number of the NFT uploader app and click the “Start” button again.


Erro: selenium.common.exceptions.WebDriverException: Message: unknown error: unable to connect to chrome at localhost:8989
Session not created: This version of ChromeDriver only supports Chrome version 102
Current browser version is 104.0.5112.102
Stack tracking:
Return:
Thank you for the tutorial, took some time but the bot works w/ the captcha.
Question: After uploading/listing the first NFT, I was prompted with a gas fee. Does this gas fee occur after every NFT? For example – if I am uploading 10,000 NFTs, will I need to pay gas fee 10,000 times?
Thanks!
Yes you have to pay that.
I have this error, I tried to upload to Poligon for so may times and then I tried to finish manually but all the time this message.
Is any solution on this error?
Start creating NFT BlackPunks #4
number 4
polygon
Exception in Tkinter callback
Traceback (most recent call last):
File “C:\Users\Design3\AppData\Local\Programs\Python\Python310\lib\tkinter\__init__.py”, line 1921, in __call__
return self.func(*args)
File “C:\Users\Design3\Desktop\NFT\bulk-upload-to-opensea-main_2\bulk-upload-to-opensea-main\upload_2captcha_V2.py”, line 489, in main_program_loop
solved_info = WebDriverWait(driver, 300).until(ExpectedConditions.presence_of_element_located((By.XPATH, “//*[classvvf=’captcha-solver-info’]” )))#HKN
File “C:\Users\Design3\AppData\Local\Programs\Python\Python310\lib\site-packages\selenium\webdriver\support\wait.py”, line 89, in until
raise TimeoutException(message, screen, stacktrace)
selenium.common.exceptions.TimeoutException: Message:
Stacktrace:
Backtrace:
Ordinal0 [0x00666463+2188387]
Ordinal0 [0x005FE461+1762401]
Ordinal0 [0x00513D78+802168]
Ordinal0 [0x00541880+989312]
Ordinal0 [0x00541B1B+989979]
Ordinal0 [0x0056E912+1173778]
Ordinal0 [0x0055C824+1099812]
Ordinal0 [0x0056CC22+1166370]
Ordinal0 [0x0055C5F6+1099254]
Ordinal0 [0x00536BE0+945120]
Ordinal0 [0x00537AD6+948950]
GetHandleVerifier [0x009071F2+2712546]
GetHandleVerifier [0x008F886D+2652765]
GetHandleVerifier [0x006F002A+520730]
GetHandleVerifier [0x006EEE06+516086]
Ordinal0 [0x0060468B+1787531]
Ordinal0 [0x00608E88+1805960]
Ordinal0 [0x00608F75+1806197]
Ordinal0 [0x00611DF1+1842673]
BaseThreadInitThunk [0x7586FA29+25]
RtlGetAppContainerNamedObjectPath [0x77657A9E+286]
RtlGetAppContainerNamedObjectPath [0x77657A6E+238]
Sometime this will happens, you can restart after changing the starting number.
when i run the application it stops responding and after some time it does not d anything and shows this on cmd
\
Exception in Tkinter callback
Traceback (most recent call last):
File “C:\Users\singh\AppData\Local\Programs\Python\Python38\lib\tkinter\__init__.py”, line 1892, in __call__
return self.func(*args)
File “upload_2captcha_V2.py”, line 249, in main_program_loop
driver = webdriver.Chrome(executable_path=project_path + “/chromedriver.exe”,options=options)
File “C:\Users\singh\AppData\Local\Programs\Python\Python38\lib\site-packages\selenium\webdriver\chrome\webdriver.py”, line 69, in __init__
super(WebDriver, self).__init__(DesiredCapabilities.CHROME[‘browserName’], “goog”,
File “C:\Users\singh\AppData\Local\Programs\Python\Python38\lib\site-packages\selenium\webdriver\chromium\webdriver.py”, line 93, in __init__
RemoteWebDriver.__init__(
File “C:\Users\singh\AppData\Local\Programs\Python\Python38\lib\site-packages\selenium\webdriver\remote\webdriver.py”, line 266, in __init__
self.start_session(capabilities, browser_profile)
File “C:\Users\singh\AppData\Local\Programs\Python\Python38\lib\site-packages\selenium\webdriver\remote\webdriver.py”, line 357, in start_session
response = self.execute(Command.NEW_SESSION, parameters)
File “C:\Users\singh\AppData\Local\Programs\Python\Python38\lib\site-packages\selenium\webdriver\remote\webdriver.py”, line 418, in execute
self.error_handler.check_response(response)
File “C:\Users\singh\AppData\Local\Programs\Python\Python38\lib\site-packages\selenium\webdriver\remote\errorhandler.py”, line 243, in check_response
raise exception_class(message, screen, stacktrace)
selenium.common.exceptions.WebDriverException: Message: unknown error: cannot connect to chrome at localhost:8989
from chrome not reachable
Stacktrace:
Backtrace:
Ordinal0 [0x00286463+2188387]
Ordinal0 [0x0021E461+1762401]
Ordinal0 [0x00133C40+801856]
Ordinal0 [0x00128855+755797]
Ordinal0 [0x00154814+935956]
Ordinal0 [0x0014E47B+910459]
Ordinal0 [0x0014E246+909894]
Ordinal0 [0x00181430+1119280]
Ordinal0 [0x0018108A+1118346]
Ordinal0 [0x0017C5F6+1099254]
Ordinal0 [0x00156BE0+945120]
Ordinal0 [0x00157AD6+948950]
GetHandleVerifier [0x005271F2+2712546]
GetHandleVerifier [0x0051886D+2652765]
GetHandleVerifier [0x0031002A+520730]
GetHandleVerifier [0x0030EE06+516086]
Ordinal0 [0x0022468B+1787531]
Ordinal0 [0x00228E88+1805960]
Ordinal0 [0x00228F75+1806197]
Ordinal0 [0x00231DF1+1842673]
BaseThreadInitThunk [0x76F4FA29+25]
RtlGetAppContainerNamedObjectPath [0x775E7A7E+286]
RtlGetAppContainerNamedObjectPath [0x775E7A4E+238]
(No symbol) [0x00000000]
I have the same problem, did you find solution?
The video is excellent, it passes the perfect Captcha but it does not put the nft for sale…
It working good but today I again run the program and it stuck after created did not list the nfts. Are have a solution MinexTuts
this is my nft link and our goal is to sale it in this week. https://opensea.io/collections/eid-sheep-nfts-club
Sometimes it stuck you can change the starting number and run again.