
Hey everyone, welcome back to Minex! In this video, I’m going to show you how to accept credit card payments directly on your WooCommerce store using PayPal Advanced Checkout.
The great thing about PayPal Advanced Checkout is that it allows you to accept card payments seamlessly without customers getting redirected away to the PayPal website. This provides a smoother checkout experience for your customers.
So if you’re looking for a way to accept credit card payments that isn’t Stripe, PayPal Advanced Checkout is a great alternative option. Let’s get into it!
Step 1: Get PayPal Advanced Checkout
To start accepting card payments on your site, you first need to have a PayPal business account. If you don’t have an account, check out the article below and the video.

It will give you a step-by-step guide to setting up a PayPal business account.
Step 2: Connect PayPal to WooCommerce
Once your PayPal business account is created, you can connect it to WooCommerce. In your WordPress admin dashboard, go to “Plugins” then “Add New”.
Search for “WooCommerce PayPal Checkout” and install the official plugin. You can also download and upload this plugin from the WooCommerce official website. After installation, activate the plugin.

Next, you have to connect WooCommerce to PayPal. Go to WooCommerce Settings, switch to the Payments tab, and you’ll see PayPal as an option. Turn it on and click the “Finish setup” button.
After that, you will see a button called “Connect your PayPal account“. I already connected my PayPal account, which is why you don’t see that option here.
You just have to click it and log in with your PayPal business email and password. This will authorize the connection between your store and PayPal.
After the successful authorization, you will be automatically redirected to your website.

Step 3: Accept Credit Card Payments
You can enable debit and credit card transactions on your website. Go back to the Payment section of your WooCommerce plugin and navigate to PayPal settings.
In the PayPal Checkout settings, enable a separate card button from the PayPal gateway. This will create a dedicated option for card payments.

Then customers will be able to enter card details and complete payment on your site without being redirected to PayPal.
After saved the changes, you will get a new tab called “Standard Card Button”. Here Check the box to enable the Standard Card Button gateway.

Make sure you check the other settings, like coupons, subscriptions, and button customizations, that you want to change.
Step 4: Test Payments
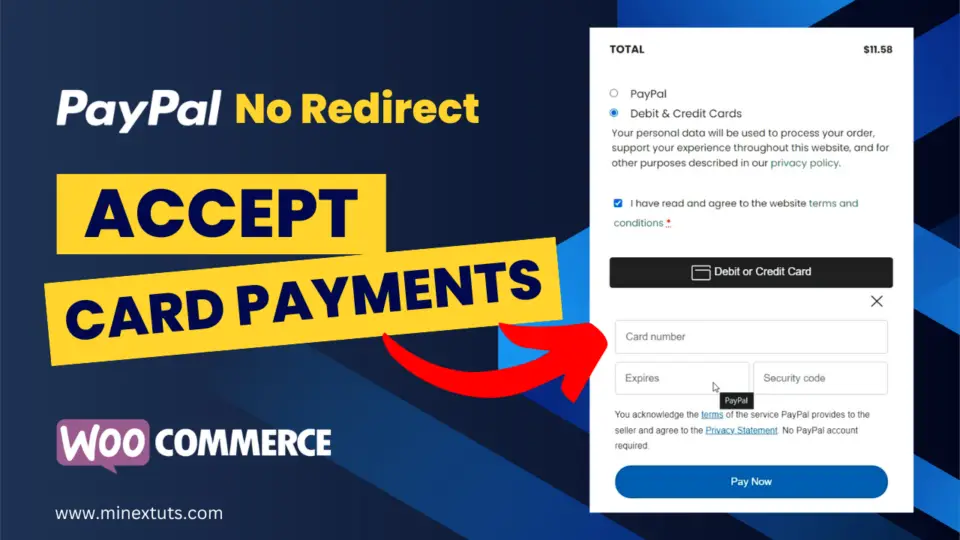
Make some test purchases on your store to ensure transactions are going through properly. When you go to the checkout page, you can see a different section for debit and credit card payments. You can pay using cards without redirecting to another site.

PayPal Advanced Checkout is now fully set up on your WooCommerce store for accepting credit card payments seamlessly.
Customers will appreciate the simplified checkout experience. You get all the benefits of accepting cards without dealing with redirects.
Let me know in the comments if you have any questions! I hope this tutorial helped show how easy it is to use PayPal Advanced Checkout.
Subscribe for more ecommerce tips. If you have any questions, open a thread on the MineX Tech forum. See you next time!


Leave a comment